

What a Pretty Picture
Measure twice, stick a hole in the wall once. Wise words when it comes to hanging art and decor in your home. Anybody can stick a nail in the wall and hang a picture on it, but in there lies the challenge to arrange these objects in a pleasing way and cause the least amount of destruction to the wall. There are many tips and tricks to hanging these items, but for the purpose of this post we will focus on methods of hanging that minimize damage to your walls and placement.
We’ve probably all heard the theory of hanging our art at eye level. But when you think about it, who’s eye level are we talking here? I’m 5’5”, often, some of my guests are over 6’, so who am I trying to please? And if not at eye level, then where? Well, multiple sources indicate hanging your art so the centre sits anywhere between 57”-65” from the floor. To test where exactly in this range works for you, but before sticking a hole in the wall, might I suggest you enlist a patient friend to hold the object in place while you stand back and survey the scene. If you’re short on patient friends, find yourself some large pieces of paper and painter’s tape. Trace out the outline of the object you wish to hang, cut it out and stick it to the wall. Once you find the perfect placement, measure the distance from the hanging wire (pulled up taught) to the top of the frame and mark that on your paper. Next, measure and mark the centre point (width-wise) on your paper. Where the wire line and the centre point connect, mark an ‘X’. This is where you’ll insert your hook into the wall.
Be intentional with your placement. Artwork should generally be centered horizontally between two points; this will help your room to feel balanced. Consider if your piece(s) will be centred over and above a piece of furniture, over a home feature (ie. bannister, fireplace, etc.), within a wall jut-out, or the centre of a flat blank wall? Refer to the paper cut-out tips above to decide what will looks and feels best.
If you’re going for a grouping or a gallery wall, you want to think of the grouping as one large piece when it comes to deciding on placement. In this case, I recommend laying out all of your pieces on the floor, preferably on a sheet or blanket that is a similar color or tone to the walls, but this is not absolutely necessary. Play around with the configuration until you come up with one that pleases you. The centre point of your grouping should generally sit within that 57”-65” from the floor. It’s your home though, so play around with this, by once again, tracing out each piece and sticking their paper stand-ins to the wall. Next, follow the steps above to determine where the hook should be placed.
Other tips and tricks:
- Use a level – great for double hooks and/or placement of an even row of pictures.
- Larger and darker pictures look better placed toward the bottom of a grouping.
- Leave some blank wall space so that your eyes can rest and appreciate each piece individually.
- When hanging over furniture, take care not to hang too high or your pieces will appear to be floating away. Your piece of furniture, just a few inches below, can act as an anchor.
- Groupings should have some common theme, ie. mat colour, frame colour, frame shape, similar or identical prints.
- If working with a grouping, the spacing does not need to be even, but try to avoid unbroken ‘rivers’ of space horizontally or vertically between pictures
- Use the right hanging mechanism for the weight and climate
Speaking of hanging mechanisms, let’s chat about some of my favourites (and least destructive) here:
The Conventional Picture Hanger
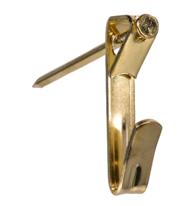
These classic hooks boast weight ratings up to 100 lbs. That said, when tested, it was found that these hooks would only support the highest weight ratings when secured into a stud. Use two of these hooks to prevent your art from swaying and sliding askew.
The Gorilla/Monkey Hook
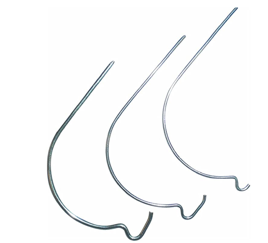
Rated up to a 40 lb weight holding capacity, these are by far my favourite way to hang my pictures and art in my home. No tools required as the pointed end is quite sharp and pierces drywall easily. They come in a flush mount option too (though this does have a lower holding capacity).
Adhesive Hooks and Strips
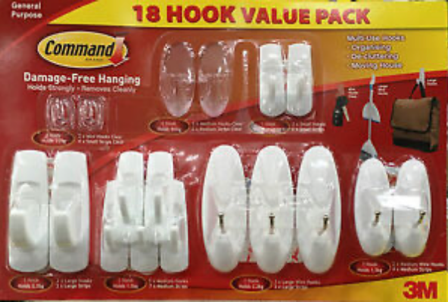
*Citysearch Rental Network Inc. is in no way affiliated with Command/3M
Hole free hanging! There is a wide variety of styles and sizes of adhesive backed hooks these days. Just be sure to follow the directions on the package when it comes to installation and removal. I have seen some considerable wall damage caused by these hooks because they were improperly removed – just remember, pull the non-sticky tab on the adhesive strip parallel with the wall or else there’s a good chance you will rip off a chunk of paint and drywall paper. Remember: Adhesives disintegrate over time and I recommend replacing the sticky strip yearly. Also, these hooks are best to avoid direct sunlight and/or high humidity.
Other rules of thumb:
- To error on the side of safety and caution, it’s recommended to use a hook/hanger/wire at least one or two sizes larger than you think you’ll need.
- Your installation will only be as strong as the weakest link in the hardware chain. For example, if you use a 100 lbs hook in conjunction with 20 lbs wire, the extra holding capacity of the hook is wasted.
- Pound ratings on hooks are not cumulative, meaning two hooks rated at 20 lb capacity will not support a 40 lb object.
- Pictures that weigh less than 5 lbs can be hung with hanging strips, adhesive wall hooks, or mounting tape. For pictures that weigh between 5-20 lbs a conventional picture hook or monkey/gorilla hook are good less destructive options. A plastic drywall anchor with a screw will work, but will leave a bigger hole. For objects between 20-50 lbs, you can use the conventional picture hanger, but make sure you’re nailing into a stud. The highest weight rated gorilla/monkey hook are also great, and if you’re not worried about the size of the hole, a metal wall anchor or toggle will suffice.
Final note: If you’re planning on hanging art and décor in your rental property you are required to remediate the area with the exact matching paint or coating to bring the area back to its original condition. If you are not confident in your remediation work, contact your property manager and they would be more than happy to arrange a painter or handyman to do the work on your behalf.